Custom Domains on Render
You can apply your own custom domains to Render web services and static sites.
Render automatically creates and renews TLS certificates for all custom domains, including wildcard domains. All HTTP traffic to a custom domain is automatically redirected to HTTPS.
Web services and static sites are always available at their onrender.com subdomain.
You apply a custom domain to your Render service in three steps:
- Add your domain in the Render Dashboard.
- Configure DNS with your domain’s provider.
- Verify your domain in the Render Dashboard.
These steps are detailed below.
1. Add your domain in the Render Dashboard
-
In the Render Dashboard, select the service that will use your custom domain.
- Only web services and static sites support custom domains.
-
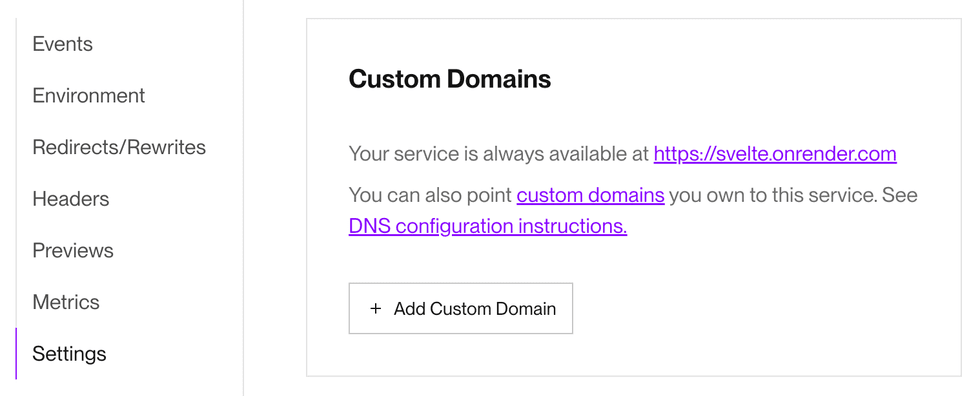
Open the service’s Settings page and scroll down to the Custom Domains section:
-
Click + Add Custom Domain and provide your custom domain name.
If your domain includes Unicode characters, first convert it to Punycode with a tool like Punycoder.
For example, you would provide
ëxample.comasxn--xample-ova.com. -
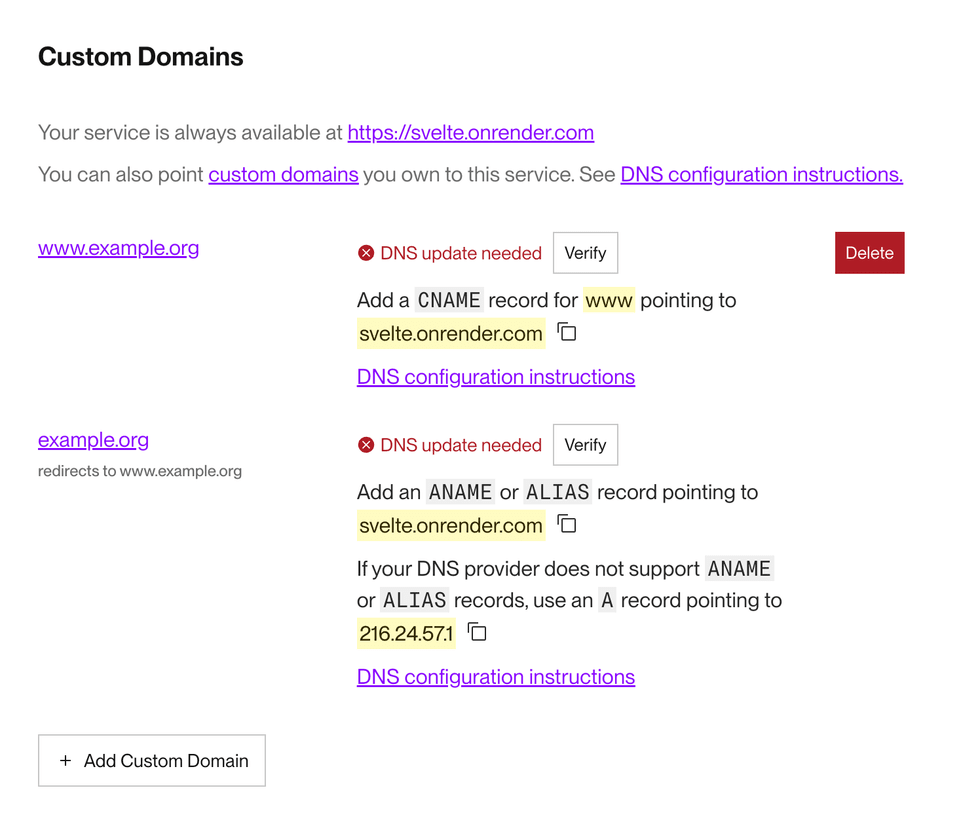
Click Save. Your custom domain now appears in the list:
-
If you add a
wwwsubdomain (e.g.,www.example.org), Render automatically adds the corresponding root domain and redirects it to thewwwsubdomain. This is shown in the screenshot above. -
If you add a root domain (e.g.,
example.org), Render automatically adds the correspondingwwwsubdomain and redirects it to the root domain.
-


Your domain does not yet point to your service! Next, you’ll configure DNS.
2. Configure DNS with your provider
Remove any AAAA records from your domain while configuring DNS.
AAAA records map to an IPv6 address, and Render uses IPv4. These records can cause unexpected behavior for your custom domain.
-
Log in to your custom domain’s DNS provider (such as Cloudflare, Namecheap, or GoDaddy).
-
Navigate to the DNS settings for your domain.
-
Add DNS records for your domain based on your provider, then return here:
If you’re adding a wildcard domain, see additional instructions.
-
Return to the Render Dashboard and verify your domain.
3. Verify your domain
-
Return to your service’s Custom Domains settings in the Render Dashboard:
-
Click the Verify button next to your custom domain.
- If verification fails, your DNS settings might not have propagated yet. Wait a few minutes and try again. See also Speeding up domain verification.
-
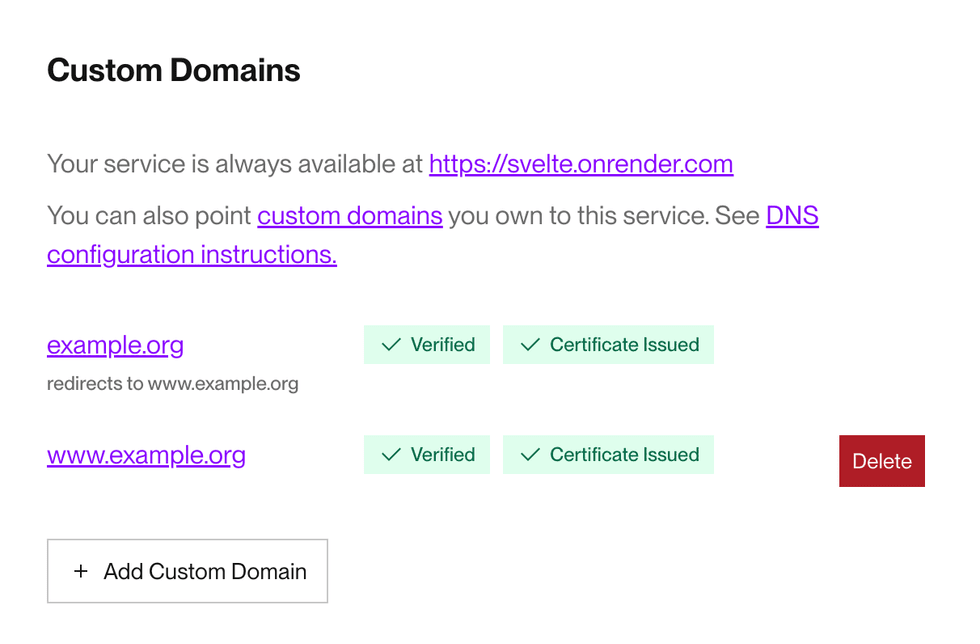
If verification succeeds, Render issues a TLS certificate for your domain and updates the verification status:
-
Try visiting your custom domain in a browser.
- If you see a 502 Bad Gateway error, Render might still be updating routing rules for your service. Wait a few minutes and try again.
-
When your custom domain loads successfully, you’re good to go!

Speeding up domain verification
We recommend removing cached entries in public DNS servers after updating your DNS records. This is especially important if you’re updating nameservers for your domains. Clearing the cache will speed up DNS verification and TLS certificate issuance for your domains.
Use the links below to clear cached records in popular public DNS servers:
Advanced DNS configuration
Wildcard domains
You can apply a wildcard domain (e.g., *.example.org) to a Render service to point all matching subdomains (docs.example.org, blog.example.org, etc.) to it:

This configuration requires setting three CNAME DNS records with your provider:
| Name | Value |
|---|---|
|
|
Your service’s Example: |
|
|
Has the format Enables Render to manage certificate issuance and renewal for your wildcard domain via Let’s Encrypt. Example: |
|
|
Has the format Enables Cloudflare (Render’s DDoS protection provider) to validate ownership of your wildcard domain. Example: |
Using Cloudflare DNS with wildcard domains
If you manage your custom domain with Cloudflare DNS, note the following:
If you add a wildcard domain (e.g., *.example.com) to Render but not the corresponding root domain (e.g., example.com), using Cloudflare with proxying enabled (orange cloud) will cause traffic for the root domain to be sent to the same Render destination as your wildcard domain.
To prevent service disruptions, make sure to disable proxying for your root domain (gray cloud). If you have any questions, please get in touch at support@render.com.
CAA records
If your custom domain doesn’t define any CAA records, you can ignore this section.
If your custom domain defines CAA records, make sure to define records for Render’s certificate authorities:
- Let’s Encrypt (
letsencrypt.org) - Google Trust Services (
pki.goog; cansignhttpexchanges=yes)
Additionally, if you add a wildcard domain, make sure to define corresponding issuewild records for each authority.
example.com IN CAA 0 issue "letsencrypt.org"
example.com IN CAA 0 issuewild "letsencrypt.org"
example.com IN CAA 0 issue "pki.goog; cansignhttpexchanges=yes"
example.com IN CAA 0 issuewild "pki.goog; cansignhttpexchanges=yes"